I learned a couple of new paper piecing tricks yesterday!


First of all, I decided to paper piece the block today. I figured that was just as easy as cutting out a template, plus it would give me an opportunity to try something that I learned yesterday. If you look at the first 3 pictures here, I’ve sewn pieces 1 and 2 together and I’m getting ready to trim, using my add-a-quarter ruler. If you look at the top right picture (depending on your device used to read this blog…) you can see I’ve laid a card on top of the seam that goes between A1 and A2.
If you’re lucky, maybe you’ll have a card that has a llama on it that you can use too! Lay the card right on the solid line, and then fold the paper over the card. The card makes it really easy to get a straight line folded. And as you might also see, I used some duct tape to tape my add-a-ruler to the top of the card.


Pull the add-a-ruler down over the top of the card and the paper which is also folded over it. Now you have an easy guide to trim from. Before, I had been blindly guessing where the straight line was to fold over; I would get it pretty close but putting the card on top makes it so easy. You don’t have to tape the ruler to the card but it does help hold everything in place plus now the card won’t be lost the next time you need to use it.
 The second trick I learned was to backstitch at the end of each seam as I sew along for 3-4 stitches which helps hold things in place better for paper piecing.
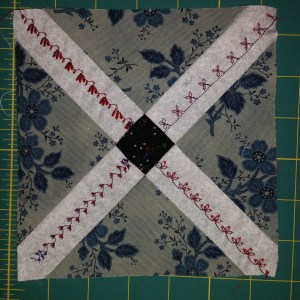
This block was super easy. Oh and Kristyne Czepuryk mentions on her blog that she designed a block that would look good with or without embroidery so I decided to try something a little different and do some different machine embroidery stitches on it. Maybe I should’ve stuck with just 1 and repeated it, but I was sampling those as I went along since I tend to never add those to anything.

I could call the hunters star quilt top done at this point since it is long enough to cover an x-long twin bed that it’s needed for. I have 7 1/2 rows. I think I’ll add one more row though to get it to 102″ long so it will be an even 12″ extra on all 4 sides of the bed. We went shopping for fabric for the back yesterday but she didn’t find anything that said “wow” to her so I’m going to cut it out of navy blue per her request.
This was a detailed and useful process to help other quilters. I really found this fascinating and beautiful!
Oh thank you! I think when I get a big chunk of time to write, I’m going to do a different pictoral tutorial on how a left-handed person does foundation paper piecing.
I am in awe of your quilting talents, your work is so precise and really beautiful. 😊
Thank you! I confess; I was starting FMQ on the Bloom quilt earlier today and saw a mistake – after it had been pieced, basted, and quilted on. I’m leaving it that way!
Only you will ever know it’s there. (And now me and anyone who reads this!) It makes handmade things unique. 😊
Haha! True!